The Easy Way to Make Beautiful Bunting (step by step tutorial with photos)
- Fiona McKinna
- Apr 26, 2024
- 4 min read

Bunting is such a British thing to have hanging from tree to tree or along your fence during an event. As soon as there is something to celebrate we get the bunting out, usually in red, white and blue. And I felt very cutting edge when I started to put bunting up in my garden here in Norway because at the time no-one else did it, but in the last few years it's become very fashionable in Norway and now I no longer feel like the only bunting owner in the village!
I love it though! I love that wonderfully summery, festive feel it gives anywhere. I love to think that I am bringing a little piece of Country Living into my life and making an ordinary day feel like a beautiful celebration. I am sure you can get away with anything if you have some bunting up.
I'm a big fan of repurposing things and I especially like repurposed fabric. I simply can't throw fabric away and I have big plastic boxes full of different types of fabric that "might come in useful". So the idea of making bunting from repurposed or second hand fabric really appeals to me and I have been doing it for years. The beauty of making small things like bunting is that you can use all those tiny pieces of fabric that you really don't want to throw away but are too small for anything substantial.
Bunting is just a triangle of fabric sewn or glued onto a strip of tape or ribbon in a line as long as you want it. It's very simple and you can quickly put together a lovely string of bunting in no time at all. When I've been in a hurry I have used single layers of fabric and glued them onto some ribbon, but for this tutorial we are going to use 2 layers of fabric and sew them onto either bunting tape or a strip of ribbon. It takes a little longer, but the bunting looks more professional and it will last longer. It might even last a few summers! If you are careful with it you can also wash it. Put the bunting into a pillowcase before you wash it and with the time you have taken to sew it your bunting will come out looking as good as new.

To make bunting
You will need:
Fabric in pretty colours. Thin fabric such as dress fabric is best
Bunting tape or ribbon that is about 1 inch wide. Measure the space you want to hang your bunting from and choose a length of ribbon accordingly. Don't forget to add about 50cm to each end for tying off.
Pins
Thread in matching colours to the fabric
Scissors
Sewing machine
Old card like a cereal box
Pencil
Start by choosing some fabric in several different colours. I like to use 3 colours that are co-ordinated in some way. Small patterns are nice because you will be able to see them in the triangles. Things like old duvet covers, sheets and curtains are prefect because they are big and flat and contain plenty of fabric and you are doing your part for the environment by recycling.
Step 1
Calculate how much bunting you will need. For a metre of bunting you will need about 3 to 4 triangles of bunting. Two triangles make one bunting point because we are going to be sewing them together to make them double sided. This way they will be pretty from whichever side you look at.
Step 2
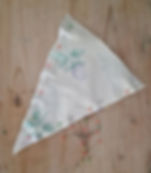
Choose your fabric and iron it. It's easier to cut if there are no creases. For a fun take on the bunting use different fabrics for each side of the triangles. Download the bunting triangle template below and cut it out from card to make it easier to draw around. You can use an old cereal box, or some recycled card for this.

Step 3
Draw around the template for the bunting triangles. Fit one directly next to the other to maximise the fabric. Cut the templates out.

Step 4
Take 2 bunting triangles and place them right sides together. The sides facing out will be the wrong side of the fabric because we are going to turn them inside out when we have sewn them together. Pin the long sides together leaving the short side unpinned. Repeat with all the bunting.
Step 5
Starting at the top edge sew one long side and then the other. Repeat with all the triangles.

Step 6
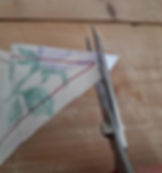
Clip the excess fabric off the point making sure not to cut through the stitching.

Step 7
Turn the triangles the right way out and gently tease out the point of the triangle. It's easiest to use something pointed like the end of a pair of scissors. Do it carefully though so as not to go through the fabric! If you are feeling very professional you can also iron your bunting triangles flat at this point.
Step 8
Take the bunting tape or ribbon and lay it out. Place the short edge of the triangle in the centre of the ribbon as shown above. Pin the bunting to one edge on the short side of the triangle. Do this with as much of the triangles as you want to make your length. I like to have the bunting triangles fairly close together (about 2 inches apart), but you can space them as far apart or close as you like. Just be sure to keep the spaces even. Fold over the ribbon so you encase the raw unstitched part of the triangles and pin again.

Step 9
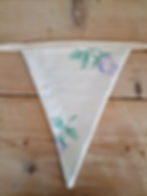
Sew along the full length of the tape or ribbon stitching the bunting in as you go and ta-da! Your beautiful bunting is finished and ready to make your garden, terrace or home look fabulous.

The final step is to find somewhere gorgeouss to hang your bunting. I like to drape mine through the trees in our garden to create a criss cross effect. It's also very pretty around a gazebo or under the windows. Because you have spent so much time making a robust bunting you will be able to leave it outside. I leave mine out in all weathers. After a couple of months it starts to fade a little on one side from the strong sunlight, but it still looks great for the entire spring and summer.
.png)


